> For the complete documentation index, see [llms.txt](https://cosmeticscore.devs.beer/llms.txt). Markdown versions of documentation pages are available by appending `.md` to page URLs; this page is available as [Markdown](https://cosmeticscore.devs.beer/adding-content/body-cosmetic/static-body-cosmetic.md).
# Static Body Cosmetic
## Models meaning
### Normal model
A normal model is the model which is shown to every player but the local player (yourself).\
This model is used only on Minecraft 1.20.1 and lower.
### Normal model 2
This normal model is the model which is shown to every player but the local player (yourself).\
This model is used only on Minecraft 1.20.2 and greater.
### Self model
The model which is shown ONLY to the local player (yourself).\
This self model is used only on Minecraft 1.20.1 and lower.
### Self model 2
The model which is shown ONLY to the local player (yourself).\
This self model is used only on Minecraft 1.20.2 and greater.
## Creation methods
### CustomModelData
You can create custom body items simply by using **CustomModelData**.
```yaml
# Example manually created hat with CustomModelData
squirrel_tail:
display_name: "Squirrel Tail"
type: BODY_ITEM
model:
gui: potion:400008
normal: potion:400008
normal_2: potion:410008
self: potion:400009
dye:
enabled: false # To avoid this item from being colored.
```
In this example I created a custom body item with CustomModelData `400008`.\
I decided to use the same item both for the GUI preview and for the actual item which will be put on player's body.\
I then set a self model, which is the model shown only to the local player and not to the other players, in this case I set the CustomModelData to `400009`.
### ItemsAdder
Same thing but using **ItemsAdder** models to avoid worrying about **CustomModelData**.
#### Example:
```yaml
# Example custom Item created by ItemsAdder
squirrel_tail:
display_name: "Squirrel Tail"
type: BODY_ITEM
model:
gui: my_item:squirrel_tail
normal: my_item:squirrel_tail
self: my_item:squirrel_tail_self
dye:
enabled: false # To avoid this item from being colored.
```
In this example I created a custom body item by using the ItemsAdder model named `squirrel_tail`.\
I decided to use the same item both for the GUI preview and for the actual item which will be put on player's body.\
I then set a self model, which is the model shown only to the local player and not to the other players, in this case I set it to `squirrel_tail_self`.
## Avoid cosmetics from obstructing view
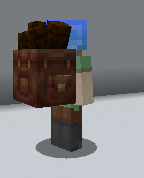
It's important to have 3 separated models because the self models will avoid getting the player view occupied by the cosmetic and potentially cause annoyances during the gameplay (placing blocks, attacking, walking).
{% hint style="warning" %}
If you are not interested into setting a `self` and `normal` model you can skip this tutorial and only use the `normal` attribute\
Do not set the `self` attribute at all if you don't want to use a different item for the self view.
{% endhint %}
{% tabs %}
{% tab title="Without the self model" %}


{% endtab %}
{% tab title="With the self model" %}


{% endtab %}
{% endtabs %}
## Implementing the self models
### Step 1
Decide a new **CustomModelData** for that item and add it to the item file or use **ItemsAdder** to automate the process (depends on your needs, refer to [ItemsAdder wiki ](https://itemsadder.devs.beer/)to learn how to create items).
In this example I use `400008` for the **normal** model and `400009` for the **self** model.
`assets/minecraft/models/item/XXX.json`
```json
{
"predicate": { "custom_model_data": 400008 },
"model": "cosmetics:body/squirrel_tail"
},
{
"predicate": { "custom_model_data": 410008 },
"model": "cosmetics:body/squirrel_tail_normal_2"
},
{
"predicate": { "custom_model_data": 400009 },
"model": "cosmetics:body/squirrel_tail_self"
},
{
"predicate": { "custom_model_data": 410009 },
"model": "cosmetics:body/squirrel_tail_self_2"
},
```
### Step 2
Edit your cosmetics configuration and add the **self** model.
```yaml
squirrel_tail:
display_name: "Squirrel Tail"
type: BODY_ITEM
model:
gui: potion:400008
normal: potion:400008
normal_2: potion:410008
self: potion:400009 # <------ HERE
self_2: potion:410009 # <------ HERE
dye:
enabled: false # To avoid this item from being colored.
```
### Step 3
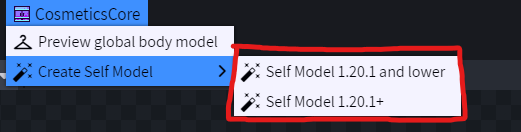
Install the official [Blockbench extension](https://cosmeticscore.devs.beer/files-editor).\
Open your `.json` file using **Blockbench**.
{% hint style="info" %}
This is a very important important step. \
You have to create the 2 **self** models and edit them until you are satisfied.
{% endhint %}
\
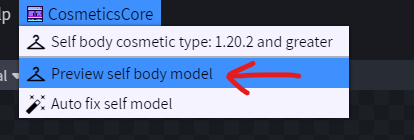
You can use the preview to check exactly how the model will be shown ingame.
## Issues with big models
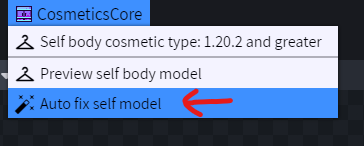
If your model is too big and you cannot move it down you have to use "**Auto fix self model**".
{% embed url="" %}
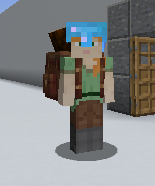
### Result